
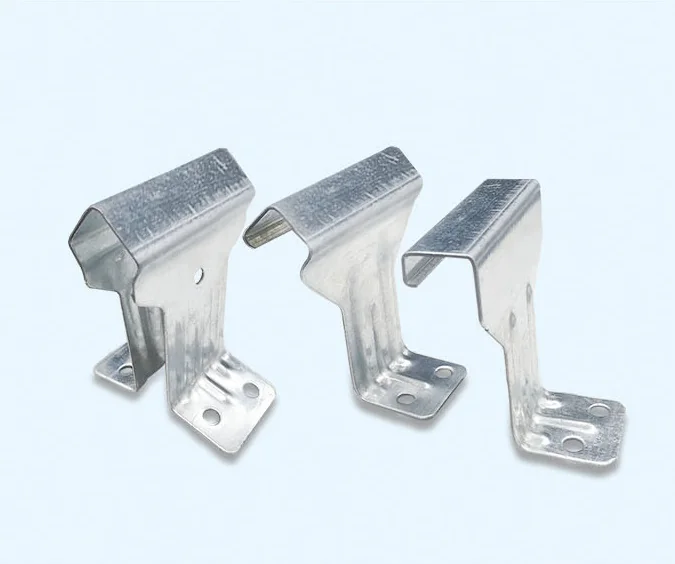
The sheets are on site, but the ribs won’t lock onto the clip lock roof clips delivered with them. Forcing the fit can distort the ribs and leave a connection that looks seated from above while only partly engaged underneath.
Two roll-formers can run the same nominal 760 or 820 profile with slightly different rib returns, so a clip that fits one supplier's sheet may not lock onto another's.
Fixing layout can cause trouble even when the clip fits the sheet. In one published investigation of storm damage to a concealed-fix metal roof, the fixings were spaced too far apart in areas exposed to high wind loads. The first row of fixings also sat too far from the sheet ends above a gutter. The extra distance increased flexing and made it easier for rainwater to run back under the sheets. Storm damage investigation
Why clips that look right can fail
In a clip-lock system, the clip is fastened to the support and the sheet rib engages with the clip. Wind uplift travels from the sheet through that connection to the fastener and support. A small difference in the clip head or the return inside the rib can change how the two parts engage. A reversed clip or a purlin out of line can also leave the sheet partly engaged.
Long sheets also expand and contract as their temperature changes. Depending on the system, movement may happen at the sheet-to-clip connection or through a clip designed to slide. Check the movement detail before choosing a replacement clip or adding fixings that could restrain the sheet.
How to choose clip lock roof clips
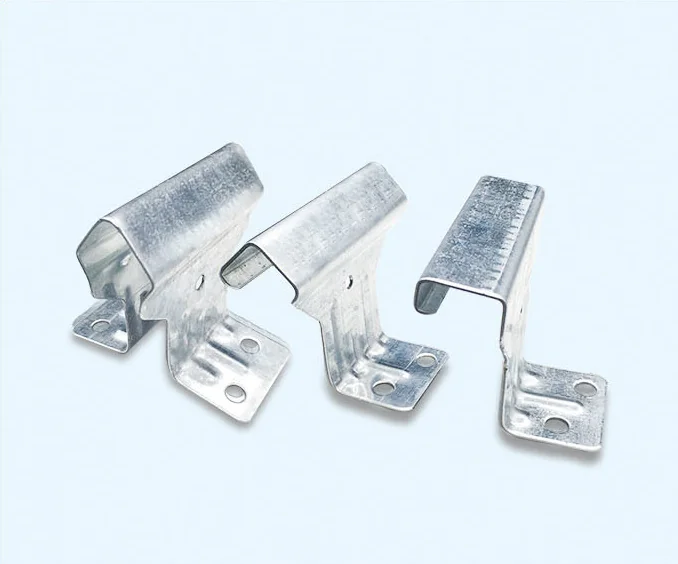
Start with the full sheet model, including any series suffix, and ask for a dimensioned cross-section. If a drawing is unavailable, send a square-on photo of the sheet end with a ruler next to the rib. For replacement work, include a side view of the original clip. The useful details are the rib height and shape, the return or locking lip inside the rib, and how the clip head sits under it. For a new roll-forming run, use a cut sample from the actual line for the final fit check.
These are examples from the VANRELY concealed-fix clip range.
| Profile | Clip materials | Clip thickness |
|---|---|---|
| 760 | Galvanized steel or stainless steel 304 | 1.2 mm |
| 820 | Galvanized steel or stainless steel 304 | 1.2 mm |
| 470 | Galvanized steel or stainless steel 304 | 1.2 mm |
| 475 | Galvanized steel | 1.2 mm |
Use the profile number to narrow the search, then confirm the rib geometry and clip reference together. Before ordering, check that the clip material and fasteners suit the sheet finish, support material and site exposure. Record the agreed sheet model, clip reference and material on the purchase order so the receiving team can check the cartons against it.
If the clip looks right in a photo but the supplier cannot confirm the match, ask for a trial sample before releasing the full order. Compare it with an undamaged piece of the sheet on a representative support. Check the side lap as well as the rib directly over the clip. A trial fit confirms how the parts engage. Use the project’s approved roof details to confirm the fixing layout and wind requirements.
Count clips from the marked roof layout and check for separate requirements at the perimeter or around openings. Include the clip reference on the receiving checklist so the crew can spot a mixed carton before it reaches the roof.
Galvanized or stainless 304?
Galvanized steel is generally suitable for ordinary inland sites when the roof specification allows it. For coastal sites, persistently humid buildings or chemical processing areas, consider stainless steel 304 where the project’s corrosion specification permits it. Check the actual exposure and the compatibility of the clips, fasteners and sheet finish. Direct salt spray or aggressive chemical exposure may call for a higher grade.
In typhoon-prone areas, confirm support spacing and fasteners against the approved project drawings.
Avoid direct contact between stainless clips and coated sheet in wet or salty conditions unless the system details allow it, and use fasteners matched to both, to reduce the risk of bimetallic corrosion.
Installation checks before laying the full roof
- Work from the roof layout and installation instructions. Confirm the support spacing, fastener specification and clip positions for the actual project. Check the requirements for the main roof area, edges and corners separately. Mark the first and last clip rows from the sheet-end details before fixing anything.
- Check the support line and set out the first clips. Check the tops of the purlins or battens for alignment. Resolve uneven supports using the specified detail. Lay out the clips in the required orientation and use the specified fasteners and fixing points for the support. Check that the clip bases sit properly before covering the row.
- Trial-fit a short run from the actual delivery. Have the installer use the system’s engagement sequence and verify that each rib seats as shown in the instructions. Check the overlap and sheet alignment before continuing. If a rib won’t seat, pause and compare the clip reference, orientation and support alignment against the drawings before laying more sheets.
- Inspect the concealed work as laying progresses. Photograph the first row and any distinct edge or corner details before they are covered. Recheck alignment periodically so a small error doesn’t accumulate across the roof. Complete eaves, ridges and flashings as specified, including sheet-end turn-ups or turn-downs where required. Clear metal shavings from the roof and gutters at the end of the shift and after completion.
Before your team orders or installs
- ☐ The sheet model, section drawing and clip reference all describe the same assembly.
- ☐ The clip material, thickness and fasteners match the project specification.
- ☐ The roof layout shows clip and support requirements by zone and at sheet ends.
- ☐ The drawings show how the sheets can move as temperatures change.
- ☐ A trial fit using parts from the actual delivery confirms engagement.
- ☐ The crew knows when to inspect and photograph the fixings before the next sheets hide them.
Find the clip for your sheet
Avoid costly rework on site. Send a clear photo of the sheet end with a ruler next to the rib (or the profile drawing if you have one), plus the profile name and quantity. We'll confirm the matching clip within 24 hours.
WhatsApp +86 173 2988 2029 sales@vanrely.com
Frequently asked questions
Will any 760 or 820 roof clip fit a sheet with the same profile number?
The same nominal profile number can have different rib returns or locking lips from different suppliers. Confirm the actual sheet section and clip reference, then trial-fit parts from the delivery before continuing with the full roof.
How should I choose between galvanized and stainless steel clips?
Check the project’s corrosion requirements and the compatibility of the clip, fastener, sheet finish and support material. Stainless steel 304 is not automatically suitable for every coastal or chemical exposure, so the material choice must reflect the actual site conditions.
What should be checked during a trial installation of clip-lock roofing?
Check clip orientation, support alignment, rib engagement and the side lap using the system’s installation sequence. Confirm fixing positions against the approved roof details and photograph concealed connections before the next sheets cover them.